Get baking for Movember

If you’re not able to “donate your face” to Movember this year but you know someone who is and you want to help them with some fundraising, there are lots of brilliant moustache related goodies out there.

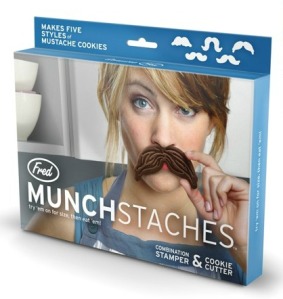
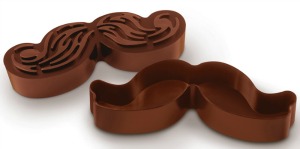
I spotted these in Oliver Bonas the other other day – Munchstache Cookie cutters from Fred & Friends. The cutter has an indented pattern on the top so you can flip it over and stamp some beautiful texture on to your Wolford, Baron, or Bristle Brush shaped mo amongst others.

They look super fun, my only reservation might be whether the cut dough comes out easily from the cutter but the stamper means less decorating work to make them look fab.

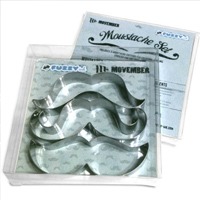
You could also try  the Fuzzy Inc ones which are available via the Movember website – looks like they ship from the US.

Wilton make these rather fab Mustache Molds (note the US spelling if you’re looking for them online!) which could be used with chocolate as well as their candy melts.  Not so widely available here with paying a hefty shipping charge, but could be used again and again.

[Edit – it seems that the Munchstaches might be sold out online at Oliver Bonas. Try in the stores or also available here.]

In the UK, all the ‘Mo Bros’ who participate in Movember help to stimulate conversation about men’s health and raise awareness of the most prevalent male cancers, testicular and prostate. 

Homemade Halloween Part II – Tiny Teeny Halloweeny Pies

I’ve been meaning to contribute to Sarah’s “Forever Nigella” monthly round-up for ages. I’m a Nigella devotee. Somehow I even seem to have a copy of “Summer Bites” and that book did too, to be honest. More notes space than recipes in there.

This month’s challenge is “Halloween Horrors” with the instructions to take a Nigella recipes and ‘halloween it up’, basically.  So let me introduce to you… the Tiny Teeny Halloweeny Pies.

Tiny Teeny Halloweeny Pies

These are a variation on the Star-Topped Mince Pies from Nigella Christmas.  I added a healthy helping of chopped stem ginger in syrup to make these a bit more tangy than your average apple pie and put a little powdered ginger into the pastry.

This just about makes 24 Tiny Pies with their scary faces. It also meant I could use the set of miniature Aspic Cutters I bought about ten years ago in Dean & Deluca. On a cost per use basis – well they were still kind of expensive, but still!

special Equipment

  • 2 x 12-cup mini pie baking tins
  • 1 x 4 or 5 cm round biscuit cutter
  • Aspic cutters or a sharp knife and lots of patience
  • rolling pin (this is v handy)

Ingredients

  • 160g plain flour
  • ½ tsp ground ginger
  • 40g of Trex (vegetable shortening)
  • 40ml of orange juice (without bits!)
  • pinch of salt
  • 2 cooking apples, to yield about 3oog once peeled and cored
  • 2 tbsp of soft brown sugar
  • 35g of stem ginger, finely chopped 

Method 

  1. Sieve the flour and powdered ginger into a shallow bowl. Add the shortening in small lumps and the diced cold butter, toss gently and put it into the freezer for 20 minutes. At the same time, add the salt to the orange juice and chill that in the fridge.  Prep the fruit for later.
  2. Blitz the flour mixture in the food processor until the breadcrumb stage. Add as much of the orange juice as you need to make it almost come together (you might have surplus juice which is fine; if you run out use iced water to finish up).
  3. On your work surface, work the mixture into a soft dough. Divide into two batches, roughly one third and two thirds of the mix, and wrap in clingfilm to chill for another 20 minutes while you preheat the oven to 220c or Gas Mark 7.


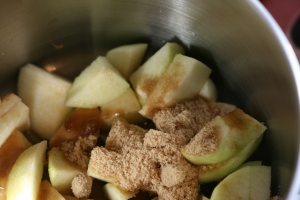
  4. While the dough is chilling, make your filling. Put the apple, ginger and sugar in a pan with 1tbsp of water and cook down slowly (chop up the apples smaller that I did!) Leave to cool a little while you make the faces and prep the dough cases.
  5. Use the larger piece of dough for the cases. When rolling out the dough, go as thin as possible – 2mm was what I aimed for. You can patch it up, this dough is pretty forgiving. If you re-roll the scraps enough you will have plenty of dough for 24 mini pies.
  6. Cut out the cases with the round cutter and lay into the tin holes.
  7. For the ‘faces’ I had an egg shaped cutter but using a round one, then pulling the face out of shape would be fine. The egg shape worked better sideways too. Use aspic cutters or a knife for the features. Then the leftover triangles you remove can double up as pumpkin stalks.
  8. Put a half tsp of filling in each one – they bubble over quite a bit.
  9. Put in the oven and check after 8 minutes.  Mine were almost done then – and two more minutes meant they were on the rather well-done side, dammit.
  10. Decorate with suitable jelly sweets – like the Natural Confectionary Company’s worms, as above.

In hindsight putting some green colouring into the filling would have worked too…if you’re making them for kids you might want to tone down the ginger or add either a dusting of icing sugar or some icing on top.

Looking forward to seeing the rest of the Horrors in the round up! For a slightly healthier treat – well, it does involve more fruit but probably also more sugar – what about Caramel Apples?

PS I notice that Lakeland have something similar to aspic cutters in their Christmas range – Tree Trinket Cutters with mini inserts to stamp out shapes in the interior of the cookie. Melt some boiled sweets in there and you’ve got stained glass cookies!

Homemade Halloween: Marshmallow Ghosts

It is a truth universally acknowledged that a newly-married woman in possession of a good kitchen must be in want of a KitchenAid.

Actually the newly married has nothing to do with it but we finally moved to a house where appliances don’t have to prove their worth by multi-tasking to earn valuable counter space (therefore hello enormo coffee grinder…) and my mother in law brilliantly ordered this for us.

This immediately made me want to make ridiculous things, preferably involving hot sugar.  I’m trying to not eat the entire world after being on a hardcore pre-wedding diet, but [serious case of “justification” coming] I’ve had this particular recipe in mind for ages and Halloween was coming…

Marshmallow Ghosts

I worked from the recipe in Matt Lewis and Rene Poliafito‘s Baked book, after seeing them float Titanic-capsizing chunks of fresh vanilla marshmallow into the hot chocolate they serve at their Red Hook bakery last year and being unable to forget them!

Make sure to be particularly pernickety about your mise-en-place for this. Even attempting to be rigorous, I had a few things that I needed to dash and find. Line the tin generously with parchment and clingfilm as you’ll need to grasp it to lever the glorious slab out when it’s set.

Equipment

  • deep 32.5 x 23-centimeter baking pan – I used a roasting tray
  • clingfilm and parchment for lining it
  • Either spray oil or oil plus a pastry brush – which I used instead of the suggested vegetable shortening in the original recipe
  • a medium heatproof bowl for the gelatin, which fits on Saucepan B as below
  • 1st small saucepan to melt the sugars mixture – Saucepan A
  • 2nd small saucepan to act as a bain marie – Saucepan B
  • measuring cups  (two sets might be useful)
  • stand mixer with whisk attachment fitted
  • heatproof spatulas – I like these as they fit in small size measuring cups
  • sugar thermometer
  • offset spatula
  • sieve or sifter
  • sharp knife, or for ghosts –
  • shaped cookie cutters, toothpicks, black food colouring

Ingredients

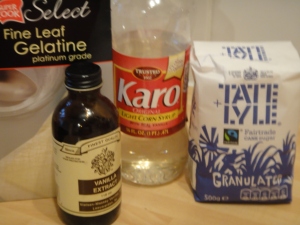
  • 8 sheets of gelatin
  • 2 cups of granulated sugar
  • 2 x ½ cups of light corn syrup (which I got in Selfridges but you could use Golden Syrup)
  • ½ cup water
  • 2 tsp vanilla extract
  • pinch of salt
  • icing sugar and cornflour mixed together 2:1 for dusting

Method 

  1. Generously line the tin with clingfilm, followed by parchment and either use spray oil to grease, or brush the parchment with oil using a pastry brush.
  2. Leave the gelatin in a bowl of cold water to soften (make sure the bowl you use will fit snugly on top of Saucepan B in double-boiler fashion for later).
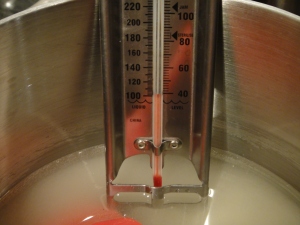
  3. In Saucepan A, stir together ½ cup of corn syrup, ½ cup of water and all the sugar. Don’t splash it up the sides and make the pan is deep enough to accommodate your sugar thermometer’s bulb! (I had to change pans).
  4. Put the other ½ cup of corn syrup in the stand mixer.
  5. When Saucepan B’s water is boiling: get the bowl and drain and wring out the gelatin sheets, then put them back in the bowl and place it on top of Saucepan B. Stir with the spatula til completely melted (it looks quite odd and just when you think it will never melt…)
  6. Pour that gelatin into the stand mixer with the corn syrup and start whisking on low.
  7. Skip promptly back to Saucepan A and take it off the heat at “Soft Ball” stage, about 235F. Bring to the mixer, turn the speed to medium then very carefully pour the contents of Saucepan A into the mixer bowl. Then turn the speed to medium/high for five minutes until you see it majestically fluff and expand.
  8. Quickly add the vanilla and salt, then give it another minute on high.
  9. Make sure your pan is ready beside you and pour the marshmallow in and spread out. Use the spatula if you must but gently tilting the tin works too.
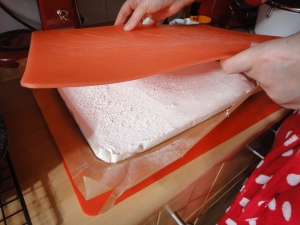
  10. Sprinkle the top with sugar.  Leave for at least six hours or overnight before attempting to cut it.

  11. Lift it out of the tin by grabbing the parchment. Flip it over using another board so you can also sugar the bottom. Either cut into large squares or use cookie cutters to cut specific shapes if you like. Toss them in the sugar and cornflour mix to coat them and minimize sticky fingers!
  12. If using ghost cutters, Draw on their expressions using a toothpick dipped in black food colouring. Then chop the remaining marshmallow into small mini pieces to use as a baking ingredient or scatter over icecream.  Store in an airtight tin, good for a week. Or get the hot chocolate ready…

I would say that while it’s not complex to make marshmallows, a stand mixer does make it easier and you have a lot of steps to get through at once, around the critical sugar-boiling stage. Also – hell of a lot of washing up, of sticky gloopy things. But I do think it’s worth it.


The Enterprise, Holborn

You know how everyone thinks that their wedding* was the bestest party ever? Well, we’re no exception to that rule. Credit where it’s due, here are some of the people and suppliers who helped us along to that conclusion.

The Enterprise, Holborn.

It’s one of those places where people narrow their eyes and say ‘Oh – I think I know it’ – but often don’t as it’s a common name. The Enterprise is hidden away opposite Lamb’s Conduit St, at 38 Red Lion Street towards High Holborn.

We wanted a central London wedding and a pub venue for the reception. Ideally without any hire fee and somewhere that we could bring in our own food. A case of hen’s teeth, you might think.

Our fabulous baker friend remembered clients who’d had a strict budget which they spent on Waitrose canapés and wedding cupcakes in a pub that allowed you to bring your own food, and that’s how we found Diana and the Enterprise.

This woman is a saint. I’d like to think we were relatively chilled (because every bride does, even as others are queuing up to slap her silly) and that was largely down to Diana’s patience and organisational skills. Her default answer is “yes” and they literally could not have been more helpful. How many pubs would say

Why don’t we just put up the 75 metres of bunting? Much easier than your coming over. We’ll do it at midnight on Friday when we close, so it’s all ready for you on Saturday at 11:00am.

And the flowers too. We can do those. Would you like balloons? What about balloons? (no, no balloons)

Tea and coffee? Well either you can supply your own which we’ll use or we’ll get in whatever you want.

And yes, we can mix a cocktail on arrival with that specific ginger beer you want and the house Bloody Marys too.

Music? Live band? Great! Just bring an iPod or use or Spotify account for when they finish. What about the disco ball? (yes, definitely disco ball)

You can drop in stuff any time you like or get it delivered directly here.

Of course, your caterer can use anything in the kitchen and we’ll get the chef to come in on Saturday morning to make sure everything is ok.

If you want to pop back on Sunday we’ll have everything packed and ready for you to take away. Or we can keep it until after your honeymoon?

How about an extension until 1:00am? That’s free of charge, we’ll sort it out.

You want striped straws and Fentimans? Just send them over.

And on, and on. We didn’t have to pay anything for hire, just meet a bar spend which was rather lower than anywhere else that we looked at. We had the pub to ourselves for the day (and when one person did wander in off the streets opportunistically, it took the staff about seventeen seconds to clock him and move him on). The pub’s Victorian glory meant we had to do very little to dress it up – in fact we did nothing as it was all handled by the pub.

The Eating.

We were in the lucky position of being able to work with people we knew well for the food.

Sylvain from Undercover Kitchen toiled away in the kitchen for about twelve hours and pretty much used every cooking method available to him. I’ve known him for a while and knew that the presentation would be great but above all the flavours would be perfect. I hear that the quail scotch eggs and the fish and chips went down well (also did that classic thing of not actually managing to eat much at our own wedding, dammit). He made piles and piles of Ginger Pig bacon butties and London Rich sausage sandwiches. He was also game for doing two complete sets of food and even supplied the sugar syrup for the bride’s cocktail. Nothing was too much trouble.

Some issues ahead of the day meant we changed the plans from a small family lunch and evening party, to brunch and afternoon tea and late night shouty singing. Baked greats – not just goods, greats – came courtesy of Scott from Kooky Bakes with American Breakfast Whoopie pies amongst other dazzlingly pretty cupcakery and also including the infamous Kooky Slice; and the amazing Arianna Halshaw of Bittersweet Bakers made all manner of treats. Particularly our favourite Rice Krispie Marshmallow ones, and flourless chocolate cookies, and cinnamon rolls…. the best damn cake ever.

It was three tiers of Guinness and Ginger with vanilla cream cheese icing and it was devastatingly tasty. To the point where I know she’s been bribed for the recipe and she very generously gave it to me too – it’s going to be our Christmas cake this year. It’s gloriously unctuous and moreish, a melting, rich gingerbready concoction. Available to order from her website…

My lovely mum brought us a great pressie, hand carried all the way from Ireland. A wheel of mature Mossfield cheese, made by my cousins from organic milk, fifteen minutes away from where I was brought up. “The Irish Cheese” is like a Gouda and also comes in other flavours like garlic and basil or herb and sundried tomato. I say: the mature wins every time. It’s available from Paxton & Whitfield here.

Steven at Union Hand Roasted Coffee dashed to get a kilo of Revelation into the post to me at 5:00pm on Thursday night after I totally forgot to order any in advance. By 4:00pm on the day of the wedding, given that the ceremony had started at 10:00, people really needed coffee.

We had a ball at our own wedding, not only because we were surrounded by a ton of people we love, but also because we had brilliant people helping us. If you’re considering a London wedding, or even further afield, can’t recommend them all highly enough. Oh, and our photographer Chris was awesome too.

Photos by Chris Osburn, Scott Ball and MiMi Aye.

*Blogging got a bit neglected with wedding planning then getting married and moving house twice, all in the same month. Normal service to resume…