Panasonic Ideas Kitchen with Rachel Allen

We’re now 4 months into our house build and while it’s had its ups and downs (more on that later) we’re at the stage where we need to start seriously thinking about what to do with the kitchen. We spend a lot of time in there as we both cook, and with the new layout we suspect that family life is probably going to revolve around that room. Cooking, eating, covering the table in glitter, glue and paper. And that’s just me!

Thanks to Panasonic I’ve had an easy decision about what microwave will be replacing our battered old one. It was already high on the shopping list as we’ll need it when the new addition to the family arrives (in November) for sterilising bottles and the like. I think most people use a microwave for a fairly limited range of functions, which is something I was guilty of (reheating food, melting chocolate, sterilising). But there are microwaves, and then there are certain slimline combi oven microwaves…

Panasonic microwaveWe had a brilliantly fun evening with Rachel Allen at Cactus Studios for a Panasonic Ideas Kitchen cookery class, and I was paired with the lovely Becky from Munchies and Munchkins.

We had a full menu to cook between all of the assembled bloggers (and well done to Becky for remembering we needed to make salsa verde, when we got caught up in watching what everyone else was prepping) and we were assigned the Lemon Drizzle Cake, to be made in the Panasonic SD-ZB2512 Breadmaker, and the beef.

Yes, that’s right. Roast Fillet of Beef with Salsa Verde. Cooked in a microwave. As it turned out, cooked to perfection, beautifully pink throughout, and with a caramelised crustyness and crisped fat outside. I really wouldn’t have thought it possible.
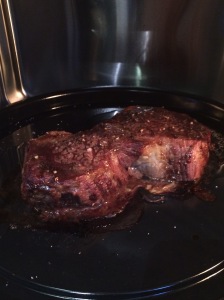
IMG_0600Just out of the (combi) ovenIMG_0602Slicing and serving up
IMG_0605

Beef ready to be devoured

The full menu, created by the lovely Rachel, showcased the combi oven and breadmaker.

Baked Potatoes with Sour Cream, Chives and Smoked Salmon

Baked Potatoes with Cheese and Bacon

Roast Fillet of Beef with Salsa Verde

Assorted Bruschetta

Herb and Onion Focaccia

Dulce De Leche Brownies

Lemon Drizzle Cake

I know I’ll get schtick for saying this, being Irish, but the baked potatoes were one my highlights of the evening! Crisp outside and fluffy inside, and cooked in a fraction of the time that a conventional oven would take. I proved my Irishness again by wanting to know, specifically, what kind of potatoes they used… Rachel understood the need.

Another outstanding moment was the unveiling of Rachel’s Dulce De Leche Brownies. Attractively marbled and with the perfect amount of ‘squidge and wobble’ which I think is a technical term, no?

IMG_0591Marbling

IMG_0598Cleaning up

IMG_0610Won’t last long

I’ve been trying to avoid relying on wheat recently (along with a few other dietary changes while pregnant, because reasons) but I was intrigued to hear that one of the breadmaker’s new functions is Sourdough, including making a starter! Makes me want to find space in the new kitchen for another appliance.

You can read about what the others cooked on Lavender and LovageMaison Cupcake and Mummy is a Gadget Geek.

Great fun evening, I’m off now to tweak the kitchen plans and figure out where the microwave is going to go!

Thanks Panasonic and Rachel for a fun and informative evening. I will be receiving a Panasonic combi microwave oven for review. All opinions my own. 

Let’s make Christmas [Chutney]

There are a couple of reasons why I haven’t fully embraced the notion of a homemade, handmade foodie Christmas before. Firstly, I’m rarely organised in time to do the sort of longer term, big batch gifts. You know, the sort of stuff you put in jars. And leave there for at least two months. Secondly, as someone who does all kind of crafty stuff, I’m a little cautious when it comes to making gifts.  I’ve never been as unlucky as a friend of mine (she knits beautiful, intricate sweaters for her family which they put away in cupboards because “They’re not quite me.” Um, well give them back? Give them to someone else?  I’ll stop now…) but suffice to say, I’m wary of putting hours and hours into a gift that might not be suitable or let’s face it, welcome. Or in this case, edible.

Leaving all that aside…this year I was ready early, we’d been to a jam and chutney class at the Make Lounge and I was making the most of a bigger kitchen. Although I no longer had my hoard of saved jars, as I had to recycle them when we moved, I found that the internet will send me a kabillion jars for not very much money …and they have red spotty lids. Anyone who knows me can tell you I’m a sucker for red polka dots. Once you have 72 jars, you feel under pressure to fill at least some of them. Ahem.

I went with a couple of Nigella recipes – by accident, as I was looking for a seasonal pumpkin recipe and then found her Christmas Chutney one and figured that if you’re going to make the entire house stink of boiling vinegar you might as well go for broke. The Christmas one is almost the same as here, though it specified fresh cranberries which I found (frozen) in Sainsbury’s and has dates as you can see here.

After quite a lot of chopping, the ‘cook down into a mush’ method couldn’t be simpler and it makes about a dozen (7oz) jars of red berry goodness. A quick lick of the spoon – after it was finished with, of course – was delicious, though of course it will have changed and mellowed to lose some of its vinegary tang when it’s come to its full maturity after, yes, you’ve guessed it, two months in the cupboard.

I’ll be delivering some of this to Vanessa’s “Let’s Make Christmas” blogger swap on Friday and will provide the actual recipe used, of course. I’d also hoped to have a couple of other things ready, as the deadline is also helpful for getting my own Christmas presents all done and ready, but we’ll have to see!  As well as some sweets and baked goodies nearer the time, I’m also going to be making a very big pot of lovely Tommi Miers‘ fabulous Chipotles en Adobo. This hearty salsa (she tells me it’ll last for years, at least two but it’s too addictive to hang around for long in your fridge) is a fantastic addition to both Mexican dishes and anything stew- or casserole-like that needs a little souping-up. It’s easy to make, just takes an afternoon of pot watching. And chopping.

There’s one other project that is due to mature in mid-December. Homemade vanilla essence is simple to make but again, it’s a question of time. It requires at least eight weeks to mature. To make it, get yourself a 1.5l bottle of vodka and approximately 20-30 best quality vanilla beans. Roll, flatten and split the beans and scrape out the tiny seeds with the tip of a very sharp knife and drop them into the bottle with each and every split pod. Leave for, you guessed it, two months. Sigh. Now to decorate them – Labeley is aimed at beer but I think we can repurpose?

It can work out to be relatively inexpensive to make big batch presents like this, although saving jars rather than buying them obviously helps, as I tend to go for as good quality ingredients as I can afford. It’s perhaps sensible compared to say, stocking up at one of the luxury food halls – and part of the attraction there lays in the beautiful packaging and the tradition of it all. This big-batch approach obviously makes sense if you’ve got a large group of friends and colleagues to buy for. But I don’t necessarily agree with people who say that homemade is a ‘cheap’ option and it certainly doesn’t mean less care or affection than something bought “in a real shop”. Suffice to say that if you see me proferring a jar or bottle of something your way this December, it’s because I think you’re someone with a discerning palate, and someone about whom I cared enough to make something for, from scratch.

Plus if the chutney is terrible, you’ll just chuck it in the bin and we’ll still be friends, right?

Homemade Halloween Part II – Tiny Teeny Halloweeny Pies

I’ve been meaning to contribute to Sarah’s “Forever Nigella” monthly round-up for ages. I’m a Nigella devotee. Somehow I even seem to have a copy of “Summer Bites” and that book did too, to be honest. More notes space than recipes in there.

This month’s challenge is “Halloween Horrors” with the instructions to take a Nigella recipes and ‘halloween it up’, basically.  So let me introduce to you… the Tiny Teeny Halloweeny Pies.

Tiny Teeny Halloweeny Pies

These are a variation on the Star-Topped Mince Pies from Nigella Christmas.  I added a healthy helping of chopped stem ginger in syrup to make these a bit more tangy than your average apple pie and put a little powdered ginger into the pastry.

This just about makes 24 Tiny Pies with their scary faces. It also meant I could use the set of miniature Aspic Cutters I bought about ten years ago in Dean & Deluca. On a cost per use basis – well they were still kind of expensive, but still!

special Equipment

  • 2 x 12-cup mini pie baking tins
  • 1 x 4 or 5 cm round biscuit cutter
  • Aspic cutters or a sharp knife and lots of patience
  • rolling pin (this is v handy)

Ingredients

  • 160g plain flour
  • ½ tsp ground ginger
  • 40g of Trex (vegetable shortening)
  • 40ml of orange juice (without bits!)
  • pinch of salt
  • 2 cooking apples, to yield about 3oog once peeled and cored
  • 2 tbsp of soft brown sugar
  • 35g of stem ginger, finely chopped 

Method 

  1. Sieve the flour and powdered ginger into a shallow bowl. Add the shortening in small lumps and the diced cold butter, toss gently and put it into the freezer for 20 minutes. At the same time, add the salt to the orange juice and chill that in the fridge.  Prep the fruit for later.
  2. Blitz the flour mixture in the food processor until the breadcrumb stage. Add as much of the orange juice as you need to make it almost come together (you might have surplus juice which is fine; if you run out use iced water to finish up).
  3. On your work surface, work the mixture into a soft dough. Divide into two batches, roughly one third and two thirds of the mix, and wrap in clingfilm to chill for another 20 minutes while you preheat the oven to 220c or Gas Mark 7.


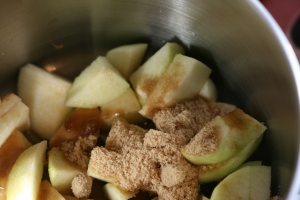
  4. While the dough is chilling, make your filling. Put the apple, ginger and sugar in a pan with 1tbsp of water and cook down slowly (chop up the apples smaller that I did!) Leave to cool a little while you make the faces and prep the dough cases.
  5. Use the larger piece of dough for the cases. When rolling out the dough, go as thin as possible – 2mm was what I aimed for. You can patch it up, this dough is pretty forgiving. If you re-roll the scraps enough you will have plenty of dough for 24 mini pies.
  6. Cut out the cases with the round cutter and lay into the tin holes.
  7. For the ‘faces’ I had an egg shaped cutter but using a round one, then pulling the face out of shape would be fine. The egg shape worked better sideways too. Use aspic cutters or a knife for the features. Then the leftover triangles you remove can double up as pumpkin stalks.
  8. Put a half tsp of filling in each one – they bubble over quite a bit.
  9. Put in the oven and check after 8 minutes.  Mine were almost done then – and two more minutes meant they were on the rather well-done side, dammit.
  10. Decorate with suitable jelly sweets – like the Natural Confectionary Company’s worms, as above.

In hindsight putting some green colouring into the filling would have worked too…if you’re making them for kids you might want to tone down the ginger or add either a dusting of icing sugar or some icing on top.

Looking forward to seeing the rest of the Horrors in the round up! For a slightly healthier treat – well, it does involve more fruit but probably also more sugar – what about Caramel Apples?

PS I notice that Lakeland have something similar to aspic cutters in their Christmas range – Tree Trinket Cutters with mini inserts to stamp out shapes in the interior of the cookie. Melt some boiled sweets in there and you’ve got stained glass cookies!

Quick “Granola”

Weekend breakfasts are a big thing around here. However, trying to lose some weight – possibly gained through pancake eating on a recent trip to the US – means that breakfasts now need to involve a lot more fruit and a lot less bacon. Bah.

Almost made muffins this weekend, but even that seemed like a lot of effort. We had the ingredients for porridge, but no desire for it. A quick google for ‘quick granola‘, something else I’ve been craving since our recent trip, resulted in this. I also received some Kerrygold Honey Spread recently which I wanted to try.  As an Irish ex-pat, well, Kerrygold is butter in our house. Apparently this stuff is lower-fat than butter – yes, I know that’s all relative – but it has enough sweetness to lift the granola too. Of course, butter and honey, or agave, would work well too.  No, it’s possibly not the healthiest option in the world. But it meant I ate a lot more fruit than I would had alongside a bacon sandwich.

Ingredients

  • 40g butter or honey spread
  • 2 tbsp dried cranberries
  • 2 tbsp sesame seeds
  • 2 tbsp pumpkin seeds
  • 1 cup jumbo oats
  • 1 apple
  • 3 tbsp organic low-fat yoghurt
  • fresh fruit to garnish
  • cinnamon, to taste

Method

  1. Peel and roughly chop the apple into a bowl, and spoon over the yoghurt to stop the apple from browning and pop it in the fridge.
  2. Melt the Kerrygold spread in a heavy frying pan, then add the oats, pumpkin seeds and sesame seeds and coat well.
  3. Stir in the cranberries, then turn the mixture out on to a lined baking tray to cool for a few minutes.  Sprinkle with cinnamon (and perhaps some crunchy light brown sugar). If you’re doing the butter and honey route, you could pop the tray in a very low oven to let it crisp up even more.
  4. Assemble the ‘quick granola’ on top of the apple and yoghurt, and add whatever other fresh fruits you’ve got to hand.


Clarence Court Eggs and the Heston Hidden Orange Christmas Pudding

What could be better than having Mark Hix expound personally on why he recommends Clarence Court eggs at a select tasting in the private dining room at Hix Soho? Better than doing a blind comparison of three egg brands via steaming plates of creamy scrambled and perfectly presented boiled eggs? Better than the eggselent* three course eggy menu that was served up to us afterwards?
The answer is “Taking home 2 doz eggs in an Orla Kiely goodie bag”. BRING IT ON.

Mark Hix talked to us about why he’s a Clarence Court Ambassador (partly the vivid yellow colour of the egg yolks – as he said, you eat with your eyes too), chattered about the modern art (all of the art in the restaurant was specially commissioned) and we had Tonnix wine to drink (a collaboration between him and Mitch Tonks, conceived over a lunch at their mutual Portuguese wine merchant, label designed by their mate Tracey Emin) and tried different a trio of egg dishes.  I loved the posset which surprised me – usually not a fan of that type of dessert.

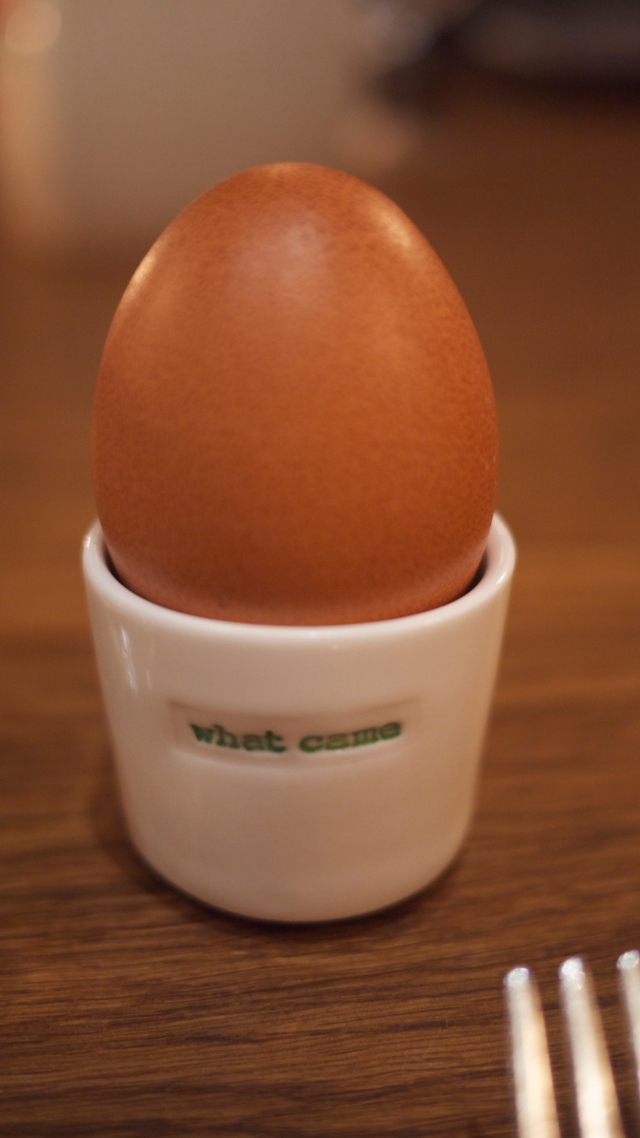
I’m already a fan of Clarence Court’s Burford Browns, and as it happened we’d just shopped so I was looking at a fridge containing 36 eggs. It’s not that big a fridge. First off, a luxurious Saturday breakfast of boiled duck egg and sourdough toast. (if only we’d had truffles too we could have tried to recreate our favourite Tristan Welch starter at Launceston Place) After 5:40 mins precisely as mandated by Delia, they were little pools of yolky sunshine and my only complaint was I hadn’t been offered two of them. The chef pointed out that they’re bigger than chicken eggs. I  tried to nick some of his and had to make do with purloining toast.

I’d contemplated making quail scotch eggs but on an evening when I knew I had to use up 500g of mince, the boyf had an inspired idea: thanks to his flicking through Nigella’s “Kitchen“, we ended up with Meatloaf.

Rather than the chicken eggs which she naturally suggests, I used one duck egg to bind it all admirably and nestled 10 hardboiled quail eggs into the centre of the meat. It works a treat as every slice has a reasonable allocation of egg throughout.

Finally I decided to attempt my grandmother’s custard to finish the eggs – I reckoned it would be the perfect accompaniment to something else in the fridge – the Heston from Waitrose Hidden Orange Pudding. I’d been thrilled when Waitrose sent me one and then hesitated to open it. My Dad *loves* Christmas pudding and I knew I’d be very popular if I brought it home.
Like “home”, home.
To Ireland, for Christmas. That was a month away at that stage.
Boo. Then Helen kindly said she had lots left over in her fridge and gave me some, and I get to be awarded the “Best Daughter” prize. Win!!

I have to admit, I really liked the pud. Mainly because it smelled just like the one my Mum makes, so it was going to be a winner, though Mum’s pud has certainly never strayed anywhere near an orange, and it’s honestly nothing like a Sussex Pond Pudding (one of my colleagues pointed out that that was where the inspiration probably came from) but I like the whole nuts and the sweetness – it was rather less stodgy than Christmas pud can regrettably be.  Famously, it sold out and there wouldn’t be any more on offer as they take too long to mature.  That makes feel almost churlish saying how well it went with proper egg custard, made with one of the last Burford Browns.

Ingredients

  • 1 Burford Brown egg yolk, at room temperature.
  • 10 g sugar
  • 100ml whole milk
  • 1 vanilla pod or vanilla essence to taste

Method

  1. Mix the milk and sugar in a saucepan
  2. Put the vanilla seeds or essence into the mixture to infuse and then bring it slowly to the boil
  3. Beat the egg yolk
  4. Slowly pour the hot mixture over the egg yolk , beating constantly so the yolk doesn’t curdle
  5. Pour the mixture back into the saucepan and whisk constantly while heating gently until it coats the back of the spoon.

Now it’s on to a dry January, and a vast stacked of Post-It’d book marks.  Lots of new recipes to try this year.

Weekend breakfast: buttermilk pancakes

Buttermilk is one of those things you get in every Irish supermarket but I usually find it difficult to track down here – that’s to say, my local supermarket doesn’t have it.  Odd, as  approximately a tenth of their floor space is given over to Home Baking, bless whoever their buyer is.  When I do find it, there are two recipes I want to make, and this is one of them: buttermilk pancakes.

I use Scott Jenson‘s recipe, though scaled back as below for two people – you’ll still be stuffed – and to use a single standard container of buttermilk.

The Wets
285ml buttermilk
1 egg
40g melted butter
1.5 Teaspoons Vanilla

The Drys
100g white flour
30g sugar
1/2 tsp baking soda
1/2 tsp baking powder
1/2 tsp  salt

I think it’s probably the vanilla that lifts these, but leaving the batter for five minutes to allow the bicarbonate to react also makes a difference.  You mix the wets, mix the drys, mix them together without overbeating, then cook a quarter cup at a time on a medium heat.  Get your pan ready and prepare to sacrifice the first pancake – my mother always says it’s ‘one for the pan’.


When crater-like bubbles start to appear, it’s time to add your toppings and flip, particularly for fruit like blueberries, sliced bananas or chopped strawberries. We experimented with chocolate chunks (squares of 80% Green & Blacks, because that was all that was lurking in the cupboard, butchered with a mezza luna) but it was a little too sickly even for me. Adding a small amount of flour-dusted milk chocolate chips shortly after you first pour the batter and it’s lightly set would probably work, allowing the chips to sink into the middle of the pancake and not just make a sticky mess when you turn it.

Plain ones work brilliantly with thin crispy rashers of smoked bacon, and maple syrup. A bottle of Prosecco, and nothing to do for the rest of the day is also recommended.  Best weekend breakfast ever.

Macaroni Cheese

I’m not making resolutions this year – why people make themselves miserable with denial, then miserable with the guilt when they tumble off the wagon is beyond me. So, unsurprisingly, no January dieting either in this household.  Yay!

The hunt for a decent macaroni cheese recipe started some time ago (good restaurant options include the main at Canteen and the side dish in Byron) and then heated up somewhat – all down to EatLikeAGirl tweeting about The Cheeselover’s competition.  I figured this would send us in the right direction, and sure enough… yes I’d heard of Simon Hopkinson but had never actually cooked any of his dishes.  Happily a little Googling pitched up this fairly classic mac ‘n’ cheese recipe (found via What’s For Dinner Darling).

We went with the suggestions of using 200g of pasta, made small store-cupboard substitutions like [lots of] black pepper, specifically whole milk, and 100g of mature cheddar along with 40g of Red Leicester in the sauce: essential for colour. The sauce was indeed stirred for fifteen minutes – what chemical reaction that effects I don’t know.  It was the right decision.

Almost an entire packet of sliced vine tomatoes topped it, sliced about 2mm thick. Good for umami, along with the parmesan, apparently. And another shaving of Red Leicester, more pepper.

Stars *****

The result? An instant classic. Ok, not one I’d cook too regularly because of its stupendous carboliciousness (no dieting does not equate ‘try to be size of a house for 2011’), but velvety cheese sauce coating perfectly cooked pasta and, surprisingly satisfying tomatoes, is a total winner. Perfect to chase away snowy day grumblings.  As a rather accomplished home cook told me recently: “I only cook for love”.  Share the mac and cheese affection.